Coasters

I’ve had a request for the pattern for these simple coasters and whilst it’s easy for some to knock up a simple circle, it often saves time to follow a quick guide. As always with crochet there are some little things that help make a neater join or finish.

I have used a coarse unknown brand yarn thrifted years ago, it was quite tough to work with but ideal for coasters. Most yarns would work but it might be useful to experiment first if you’re making a set for someone.

The yarn I’ve used is roughly dk weight and I wanted a tight fabric so I’ve used a 4mm hook. 4.5mm might have been a tad easier on the hands.

U.K. terms

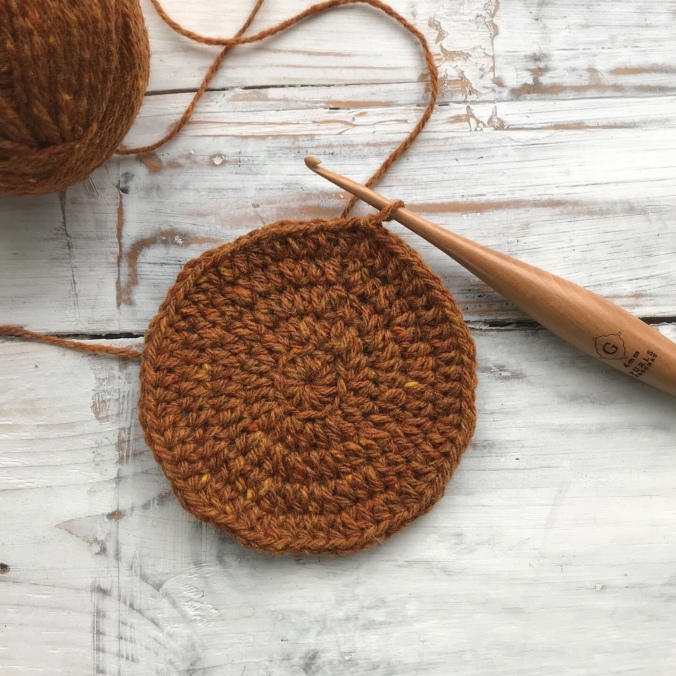
Start with a magic circle (picture 3) and chain 2 (does not count as a stitch).

Round 1. Into the circle make 12 htr’s and join with a slip stitch to the top of the first htr (not the chain 2).

Round 2. Ch2. 2htr in each stitch around, join as before.

[check your stitch count here, you should have 24 stitches. It’s important to ignore the ch2 at the start of every round and don’t count it as a stitch. With the joining slip stitch into the first htr it should push the ch2 slightly behind your work and therefore create a neat join.]

Round 3. Ch2. *2htr in next st, 1htr in next st* repeat from *to* around, slip stitch as before. (36sts)

Round 4. Ch2. *2htr in next st, 1htr in each of the next 2sts* repeat from *to* around, slip stitch as before.

Round 5. Ch2. *2htr in next st, 1htr in each of next 3sts* repeat from *to* around, slip stitch as before.

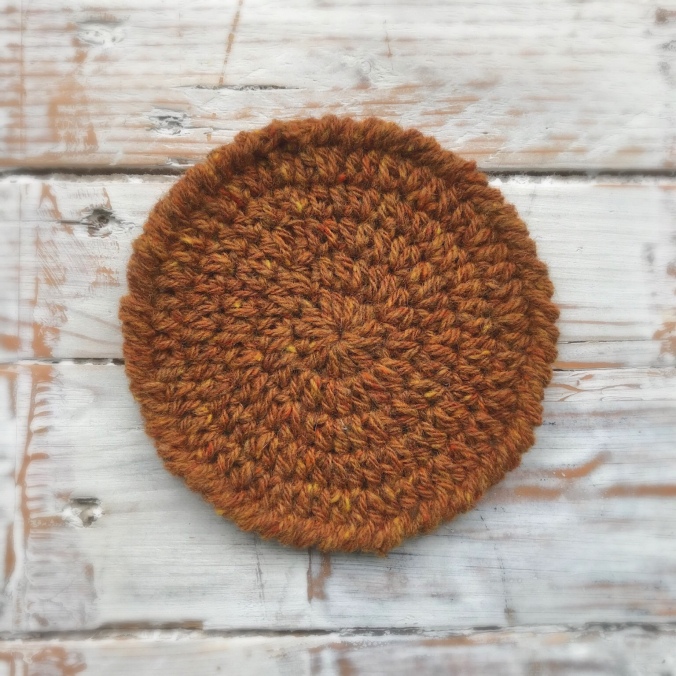
Round 6. Ch1. Crab stitch in dc around (picture 6) and slip stitch to join.

Weave in ends. If necessary, block or press with a cool iron.

(In rounds 3-5, you are simply increasing the number of single htr’s between 2htr in the same stitch, using this formula you can make a whole place mat too!)

Although not terribly exciting, this is the ultimate simple travel project. There’s nothing worse than a traffic jam and not having your crochet with you. One random ball of yarn and a spare 4mm hook has now been tucked into my glove compartment just in case!

Stash Buster Crochet Cowl

With quite a bit more time to myself lately and the thought of winter approaching I’ve been sorting out my wool supplies and throwing ‘useless’ quantities in a bowl. Useful quantities have been tidied up, caked and divided into ‘pure wool’ and ‘everything else’. This bowl of pure wool but supposedly useless amounts spoke to me one evening and said, cowl!

I don’t know if it was the colour, the stash busting or the simple but useful aspect but it’s been a popular Instagram post so I thought I’d share how I made it. At first I thought, well it’s v stitch, it’s obvious, but on closer examination of my stitch guides there is actually a large number of ways of doing a v stitch. I’ve made two now and I made vague mental notes the second time so I can’t guarantee these instructions will be perfect but here goes!

DK yarn

4mm hook

Leaving a reasonable length of yarn for sewing gap chain 120 plus 2 for turning. The turning chain does not count as a stitch.

Half treble in first stitch and in every stitch across. Join with a slip stitch taking care not to twist the loop. (The gap between htrs can be sewn up now or later).

[you can of course make 120 foundation half trebles and join if you prefer]

The V stitches will be created as follows: htr, ch1, htr all into the same stitch.

Create the first v stitch in the same slip stitch used to join the round, this one will be created by using a ch3 to represent the first htr plus ch1.

*Miss 2 stitches, create v stitch, repeat from * until end of round. Slip stitch into second chain of starting chain, then slip stitch into the ch sp.

Change yarn colour if desired. Begin each round with a ch3 (acts as first htr and ch1).

In the second and subsequent rounds you’ll be working the v stitches into the chain spaces.

A note about colour changing…everyone has their own way of changing colour. For this pattern I pulled a loop of new yarn through the slip stitch performed in the ch sp at the start of a new round. If you plan to do one colour per round it helps enormously to sew in two ends at the end of each round so that you don’t have a big task at the end but also so that the ends are out of the way for changing in new colours.

Work until your cowl measures approximately 28cm tall or based on personal preference. As a guide mine measures 31cm wide and 28cm tall. I’ve sized it to be warm rather than with a decorative drape.

For the final round work 1 htr in each stitch around, join with a slip stitch and sew in ends.

I’ve used the softest of dk scraps for my final 2 rounds, in this case a tiny ball of angora that I had in my supplies. It’s just right for where the cowl will snuggle under the chin.

Crochet Cotton Face Pads

A couple of factors prompted me to finally get round to making some of these cotton face pads. One was clearing out E’s various drawers and boxes and finding no less than five half used packets of cotton face wipe pads, decanting them into one storage basket and throwing away five plastic bags. The second was a tip from a helpful girl at Lush who said that it’s better to spray your toner straight onto your face and then gently wipe it off, that way you get more of the product on your face and less of it on the cotton pad. I’ve been doing it the other way round all these years!

So I grabbed my favourite unbleached dishcloth cotton and made some of these reusable pads, and since it generated a bit of interest on Instagram I thought I’d share how I did it here. There’s not much to it really and you could easily just make a dc circle which would end up thinner and use less cotton, it might even work better but we like the puff stitch version for now.

You will need: one ball of dk weight unbleached dishcloth cotton

6mm hook

Wool needle for sewing in ends

In U.K. terms…

[Special instructions: puff stitches (yarn round hook and pull up a loop) three times. Pull yarn through all seven loops on the hook. Secure with one dc stitch.]

Start here: Make a magic circle and dc once, work 8 puff stitches into the circle and join with a slip stitch to the top of the first puff stitch made. Pull your magic circle tightly closed and sew end in later.

Slip stitch into the next space, dc once and work pairs of puff stitches into each space. (Secure puff stitches with a dc stitch as before but no extra dc’s are needed as you move from one space to the next). (8 pairs of puff stitches)

Join with a slip stitch to the top of the first puff stitch, slip stitch into the next space and work one dc into each dc around, slip stitch to finish. Break yarn and weave in ends.

Making this final one for the photo’s above bought the tally to 14 from one 100g ball. They use about 6 or 7g each. I’d suggest popping them in a small laundry mesh bag for the washing machine to prevent them getting stuck in the door seal or somewhere unhelpful!

Next on my list are simple crochet sleeves for our stainless steel straws. I’m just pleased the family are finally adopting more environmentally aware ways. They really didn’t appreciate me replacing kitchen roll a few years back with squares of cut up old shirts, despite the fact that it’s absolutely no bother at all and there’s always plenty of them to hand. Light use rags get washed and anything else (lets be honest here, the dogs will insist on puking grass up from time to time!) gets thrown away.